How to Set Up Payment Badges on Product Page
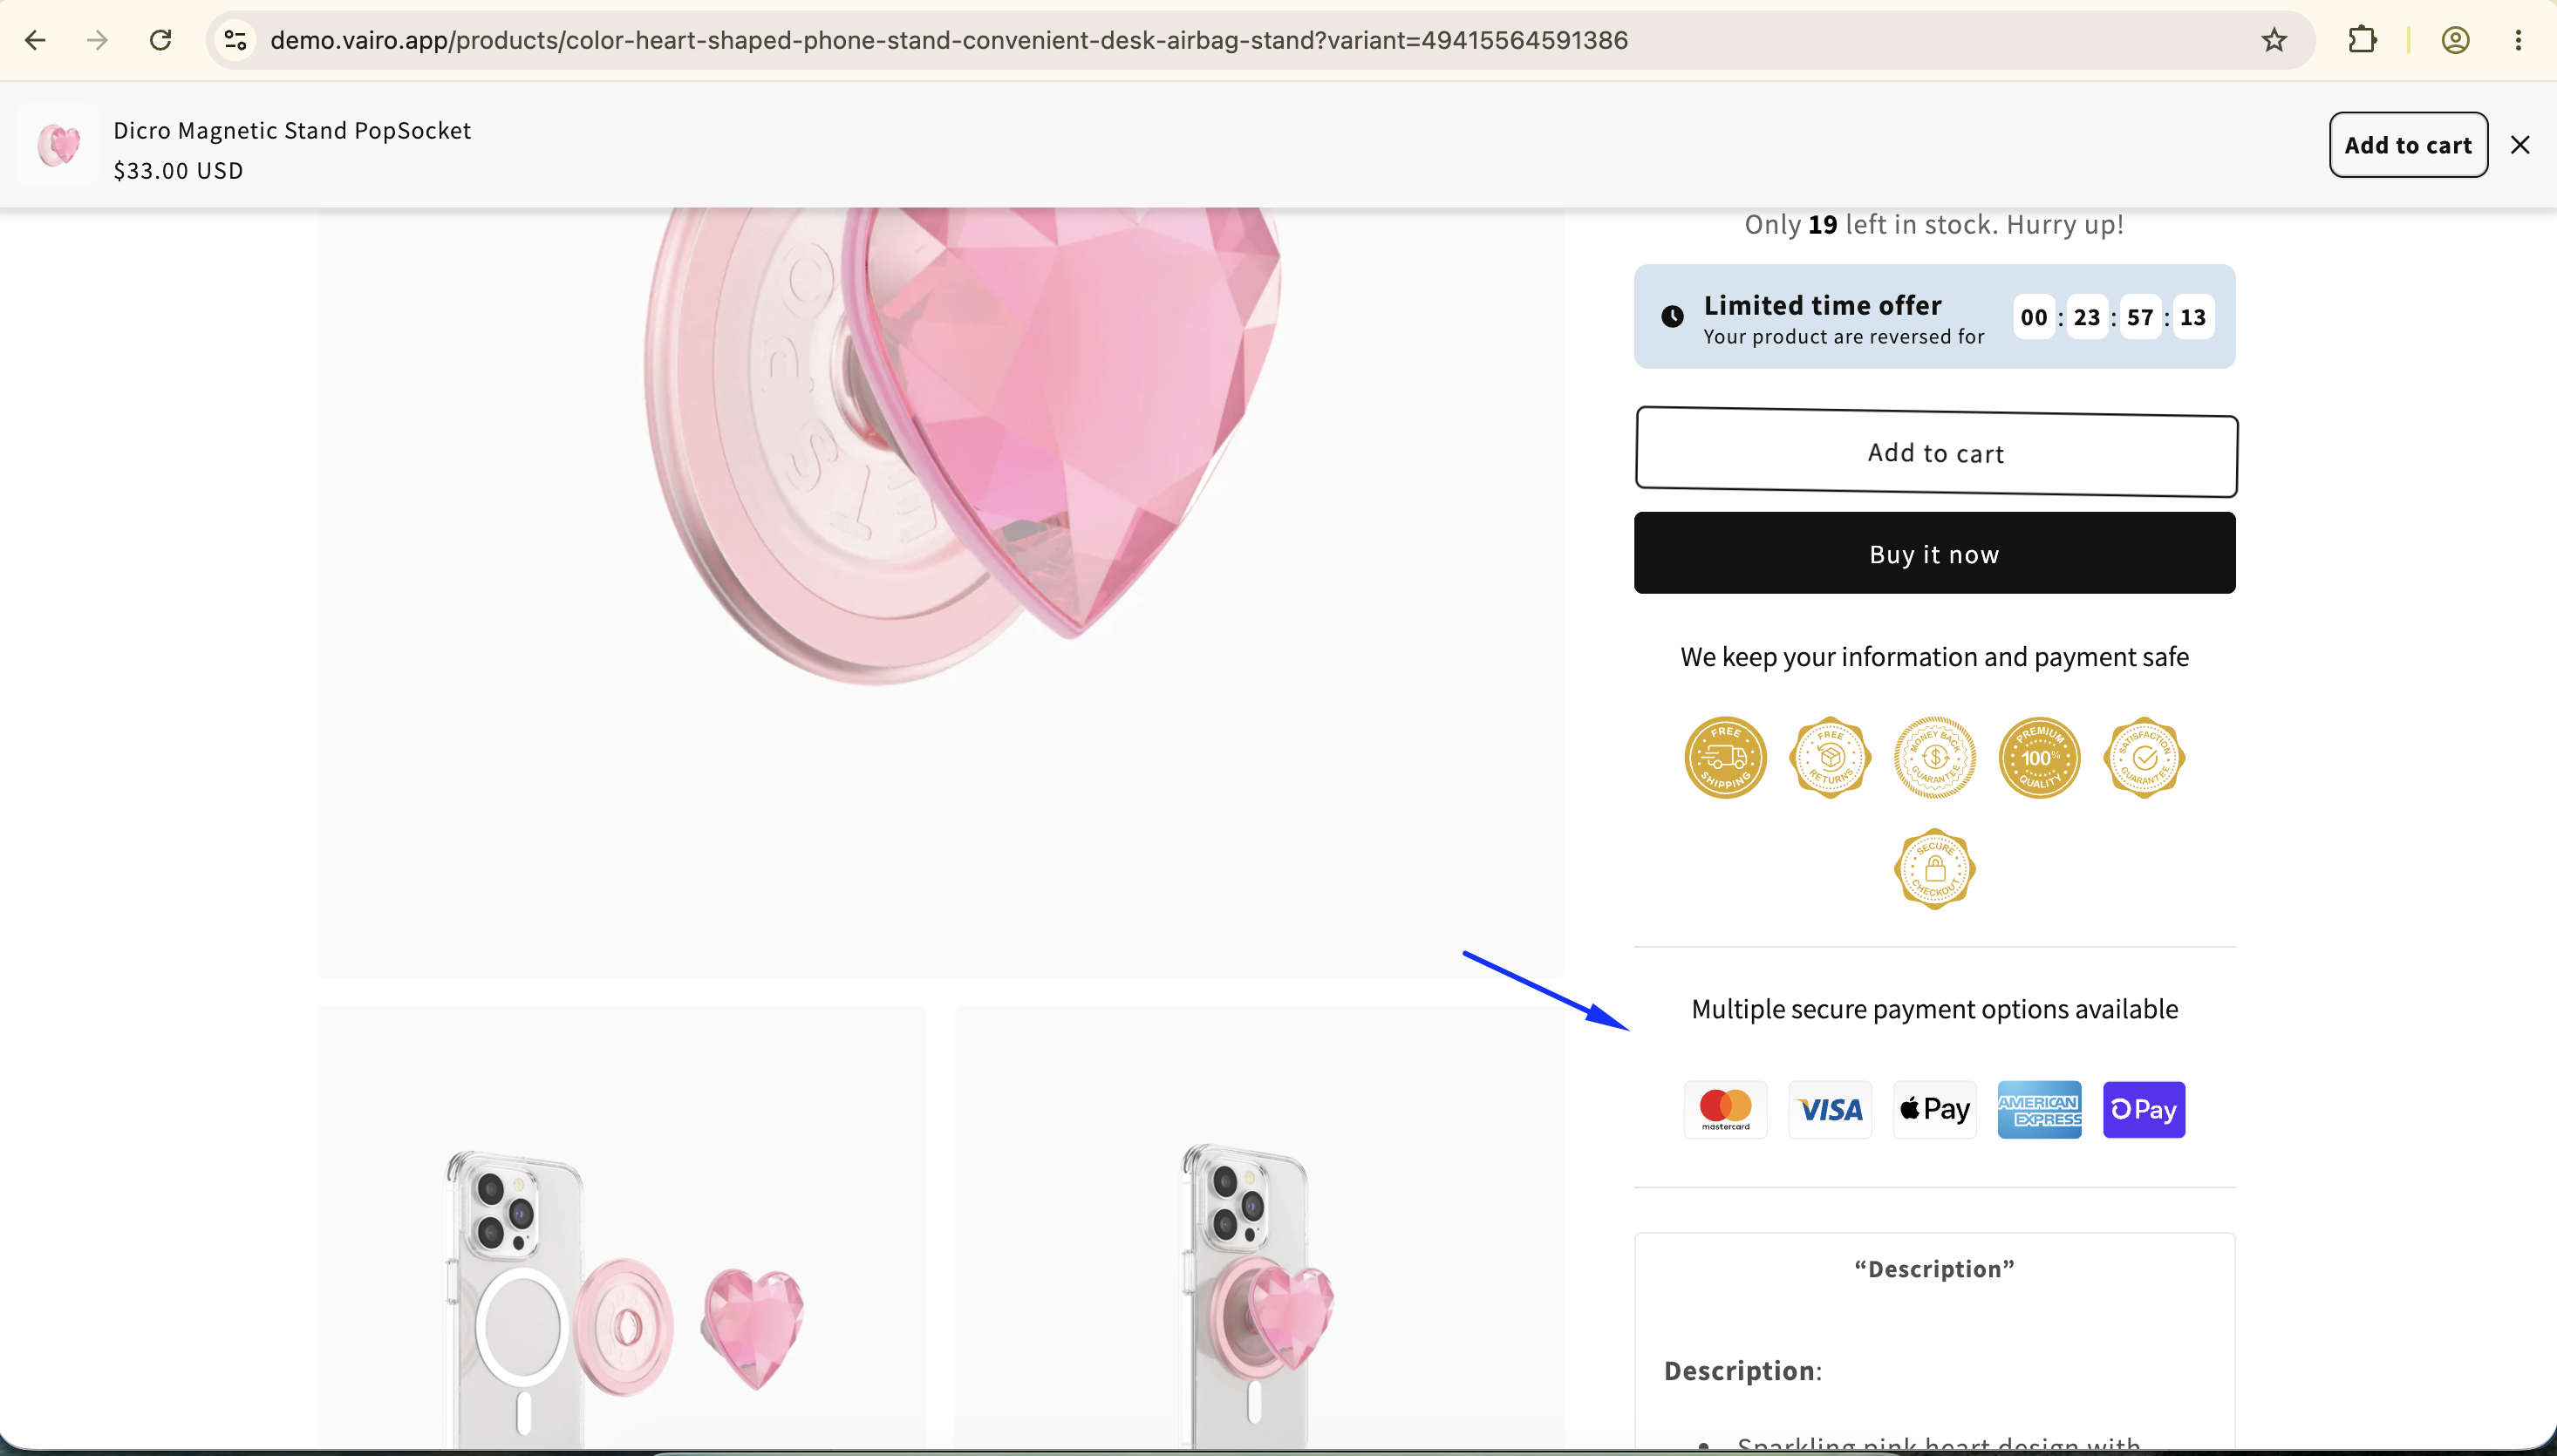
Payment Badges display trusted payment method icons near your product information to reassure customers and reduce purchase hesitation. Showing familiar and secure payment options helps build trust and improve conversion rates.
How Payment Badges Appear on Your Storefront
How to Set It Up
Step 1: Add the Payment Badges Widget
- Open Vairo in your Shopify Admin.
- Navigate to Social proof > Payment Badges on Product Page.
- Click Add Widget.
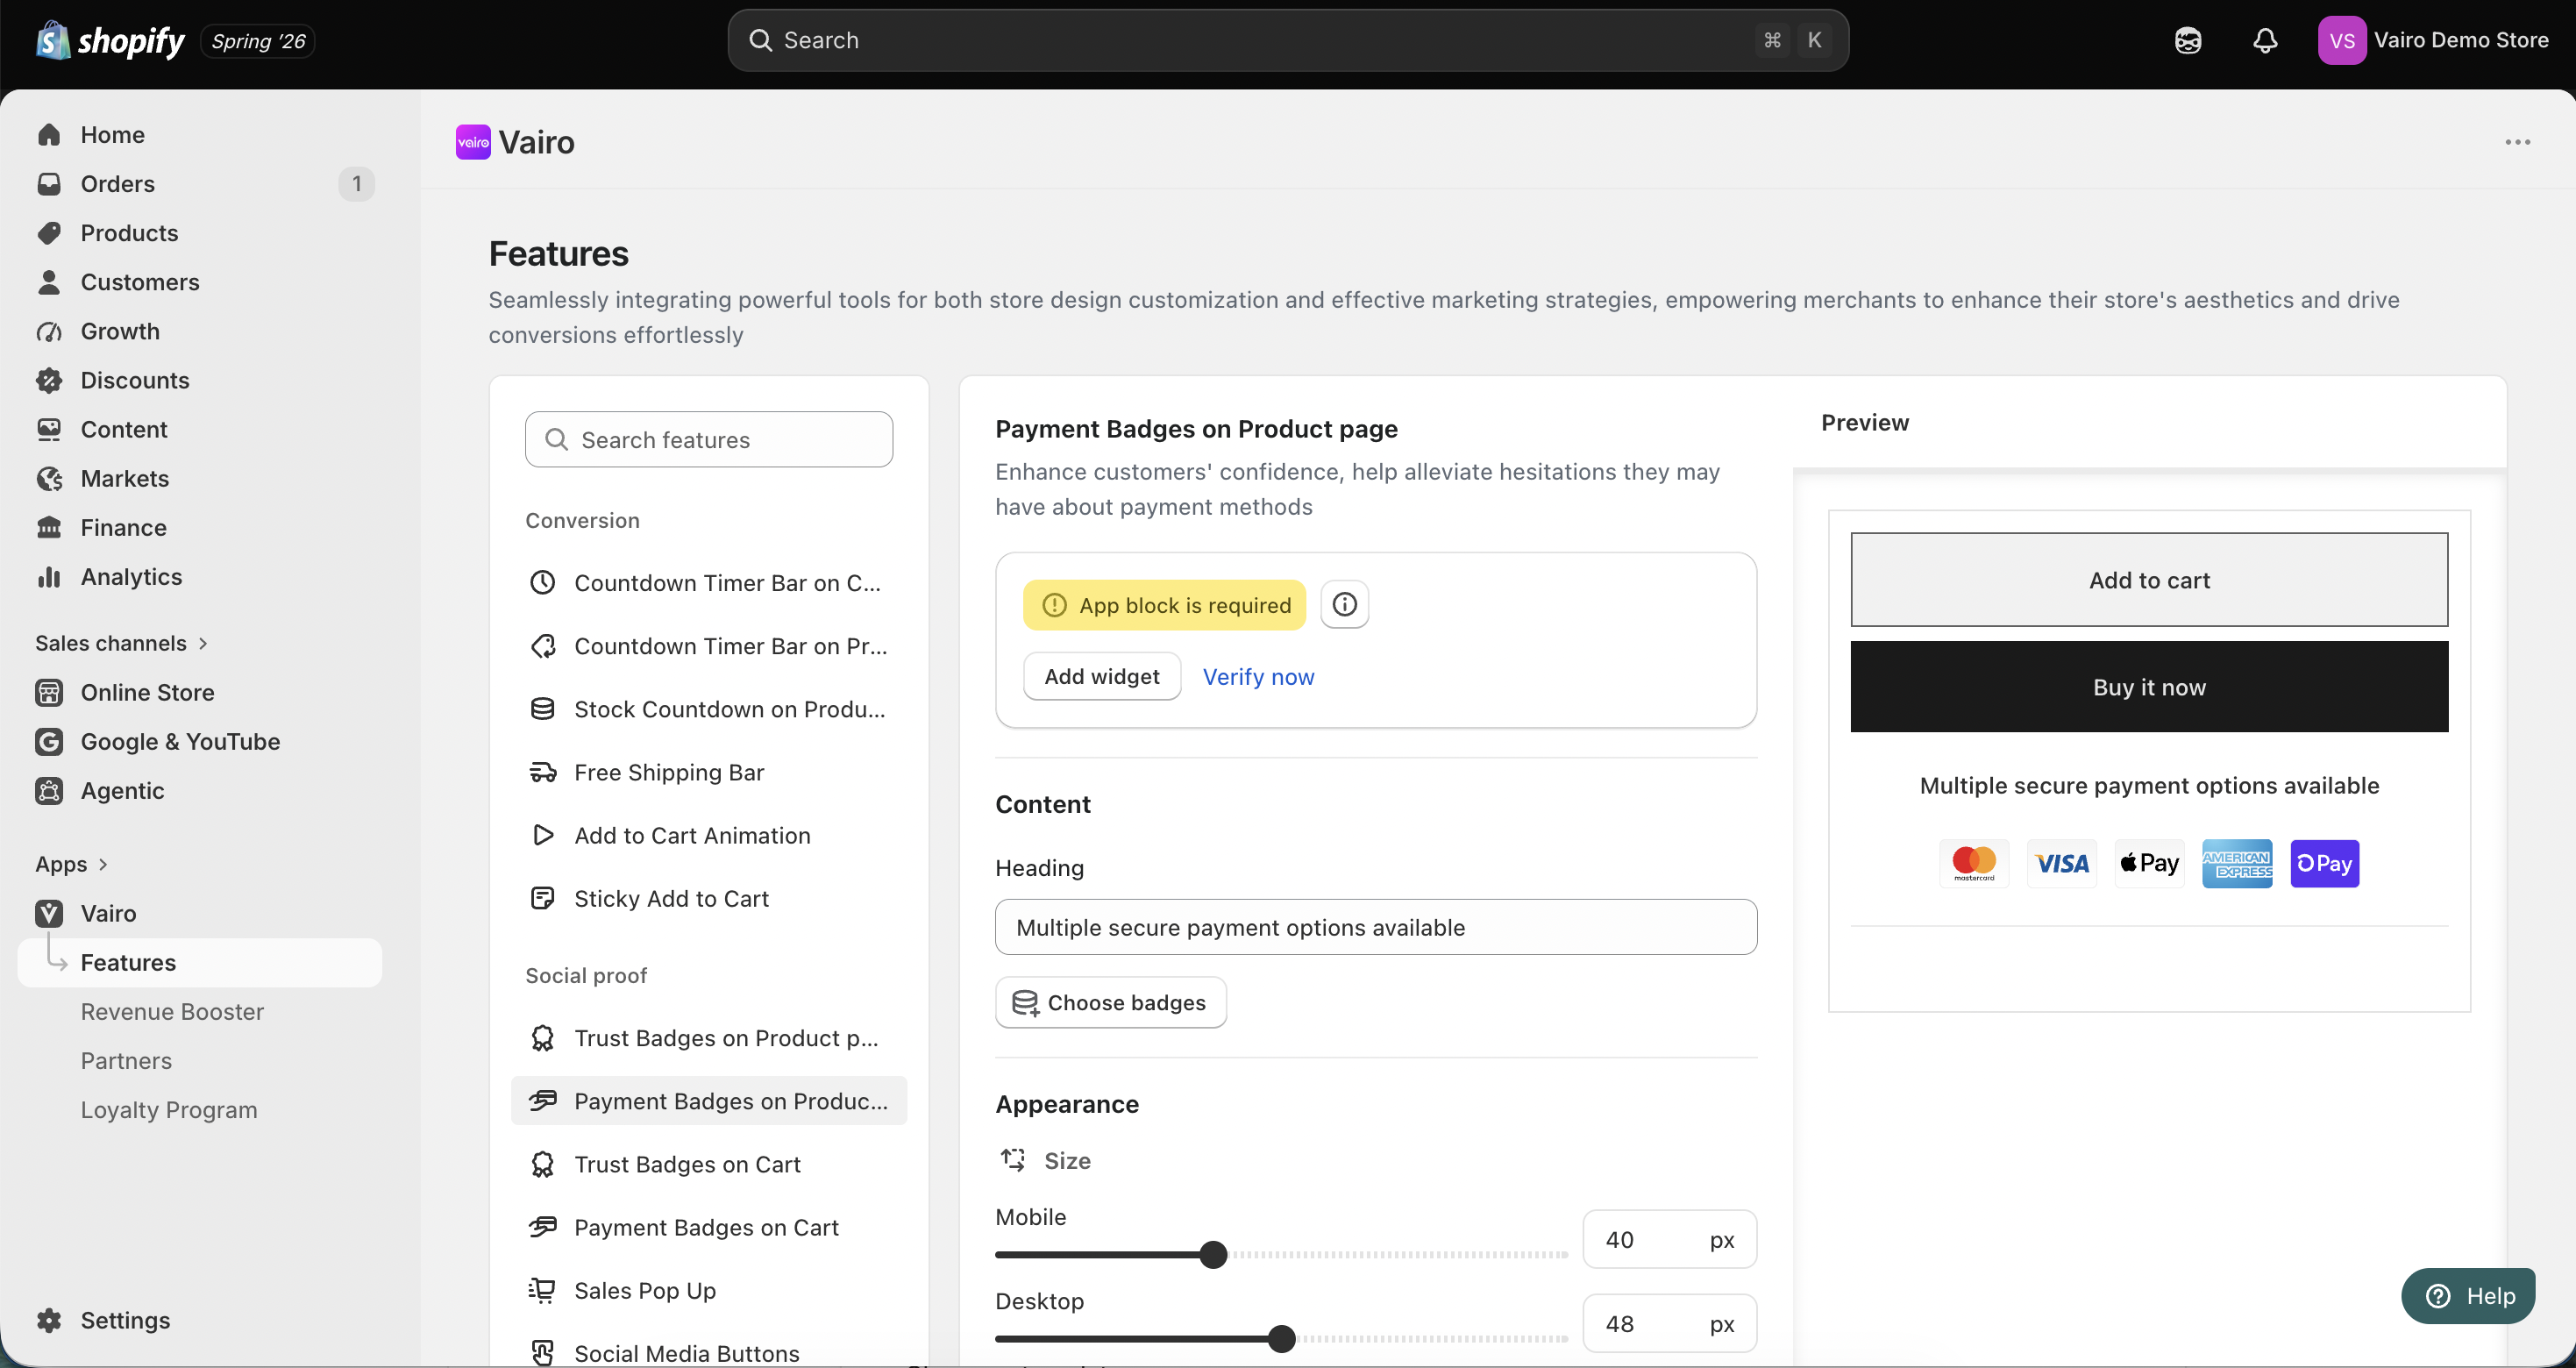
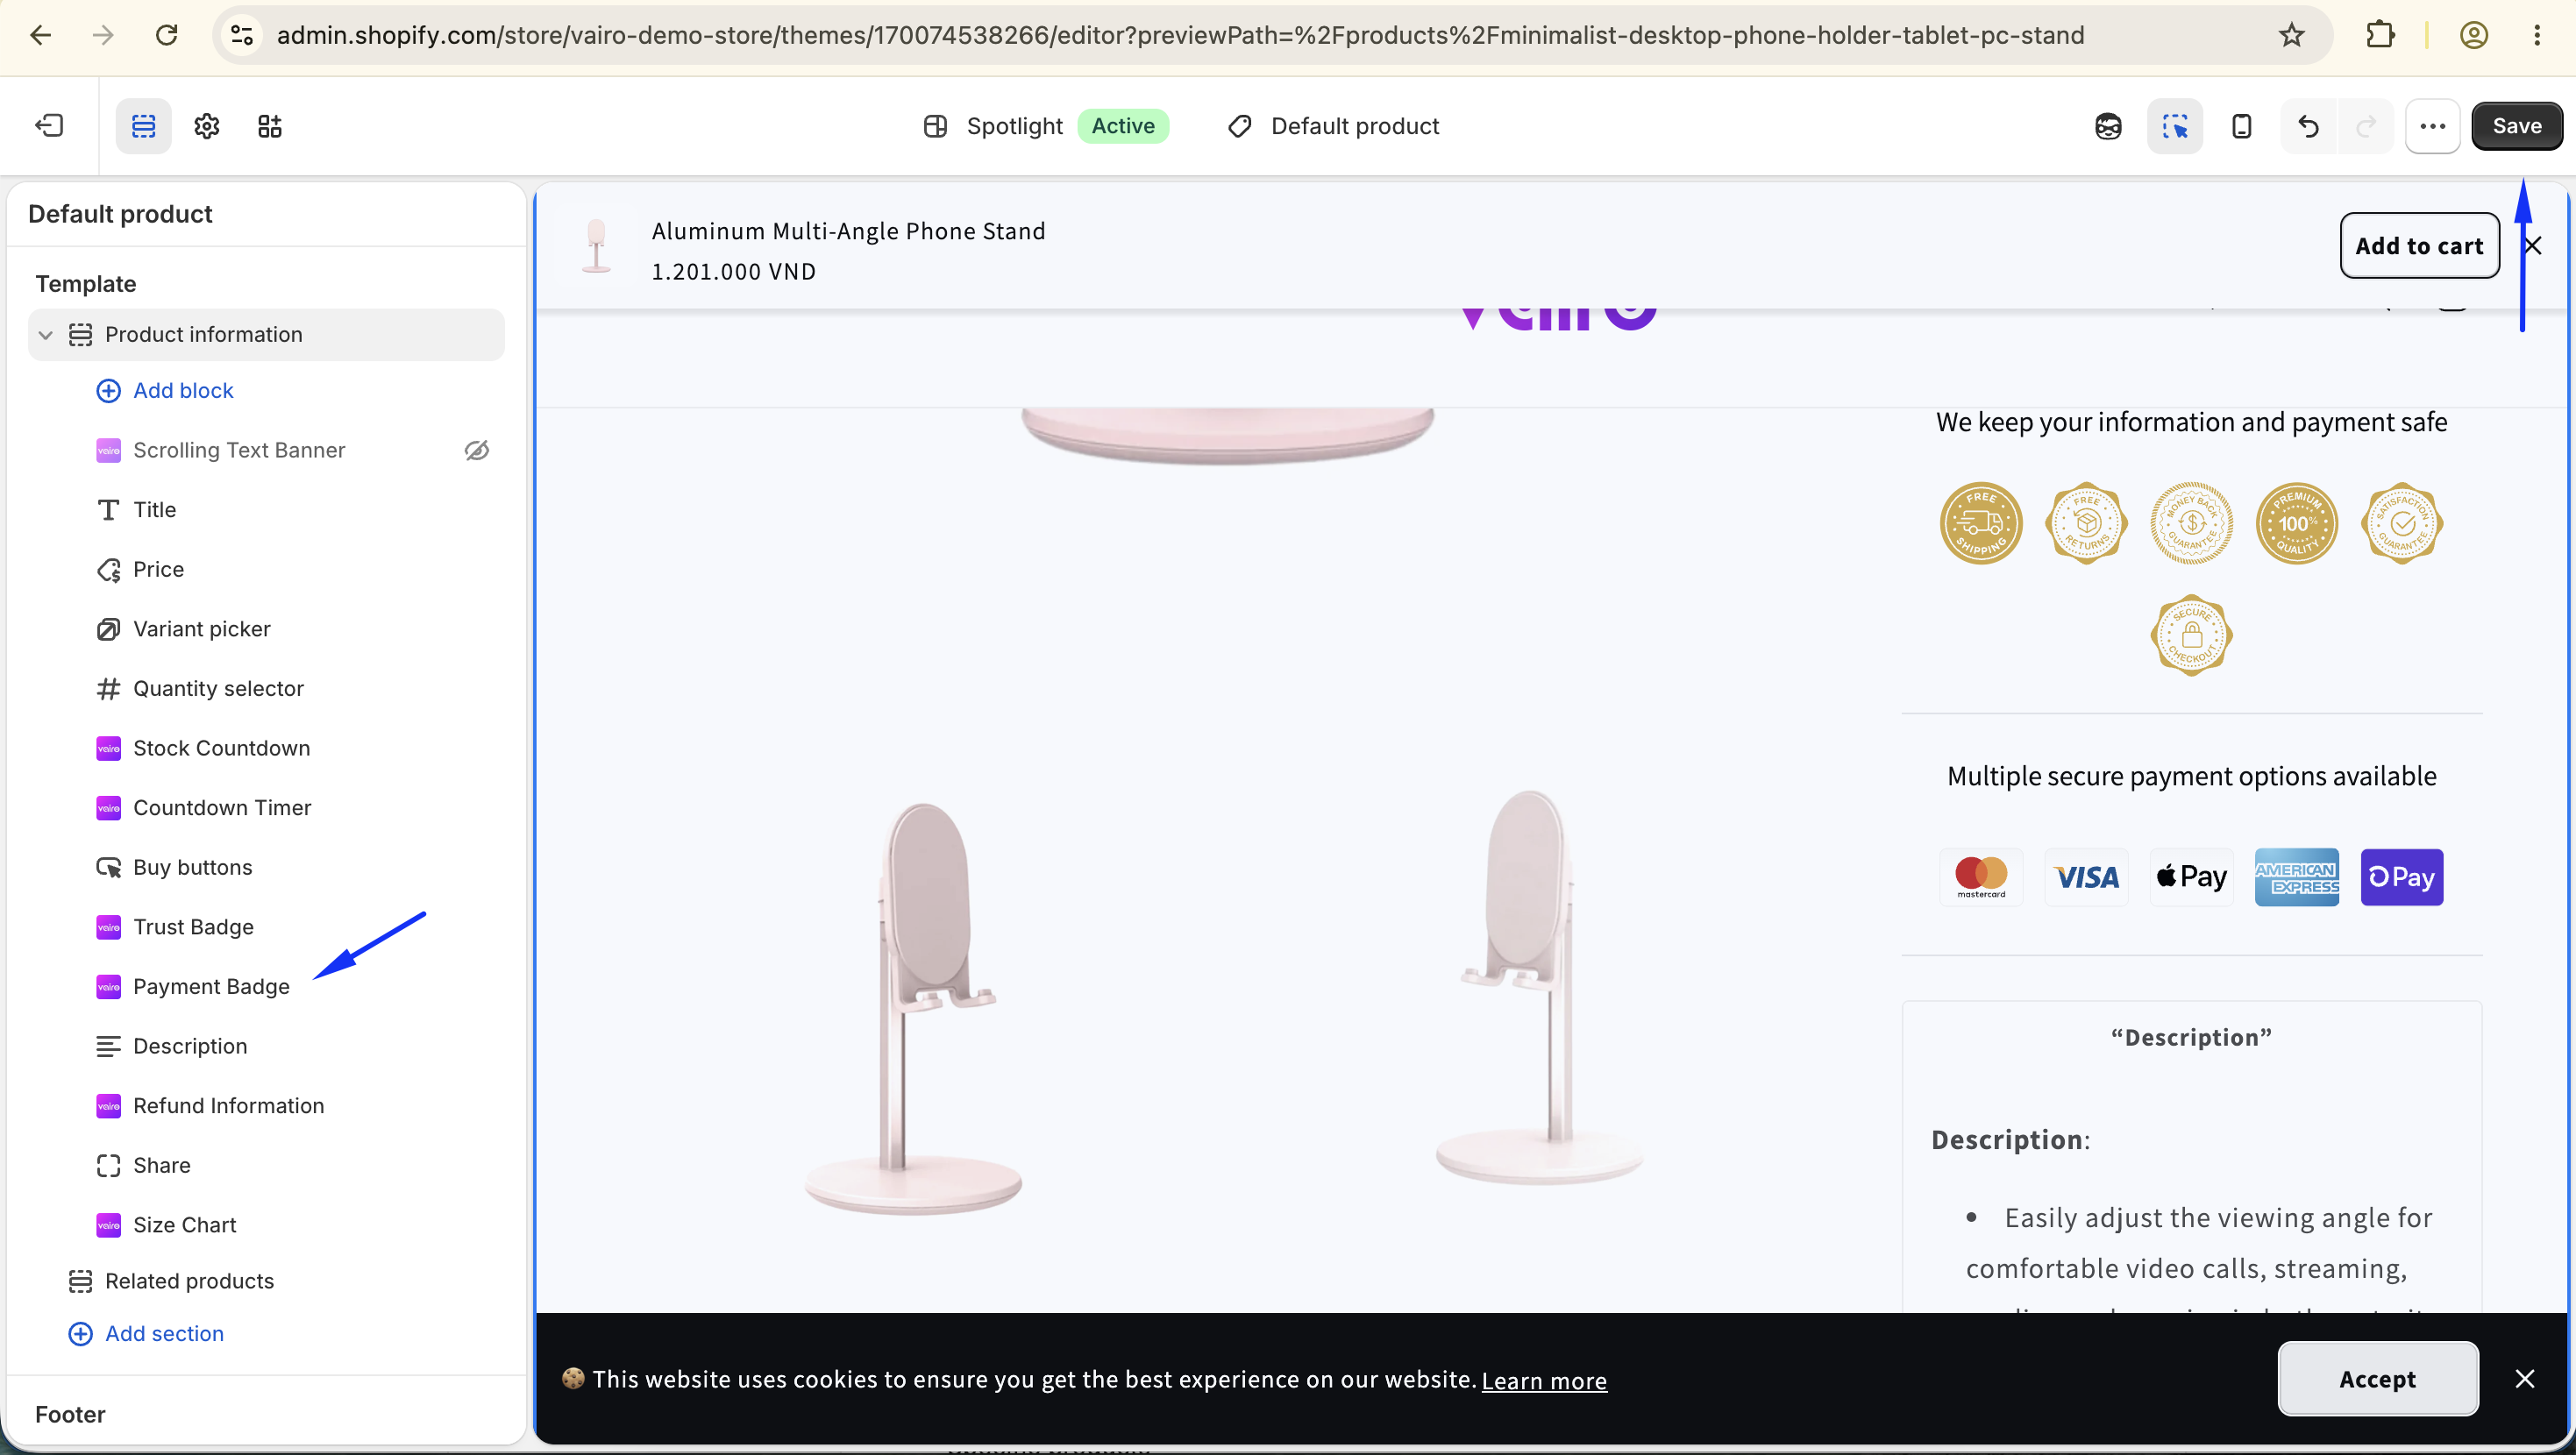
You will be redirected to the Shopify Theme Editor.
- Drag and place the Payment Badges app block in your preferred position.
- Click Save.
- Return to the app and click Verify Now to confirm the app block was added successfully.
- After verification, activate the feature to display the Payment Badges on your storefront.
Step 2: Configure the Payment Badges
In the Settings section, you can:
- Enter a heading for the Payment Badges section.
- Choose the badges you want to display.
- Drag and reorder the badges to change their display order.
- Choose where the Payment Badges are displayed:
- All products
- Specific products
Step 3: Customize the Payment Badges Appearance
In the Appearance section, you can adjust the badge size for both desktop and mobile devices.
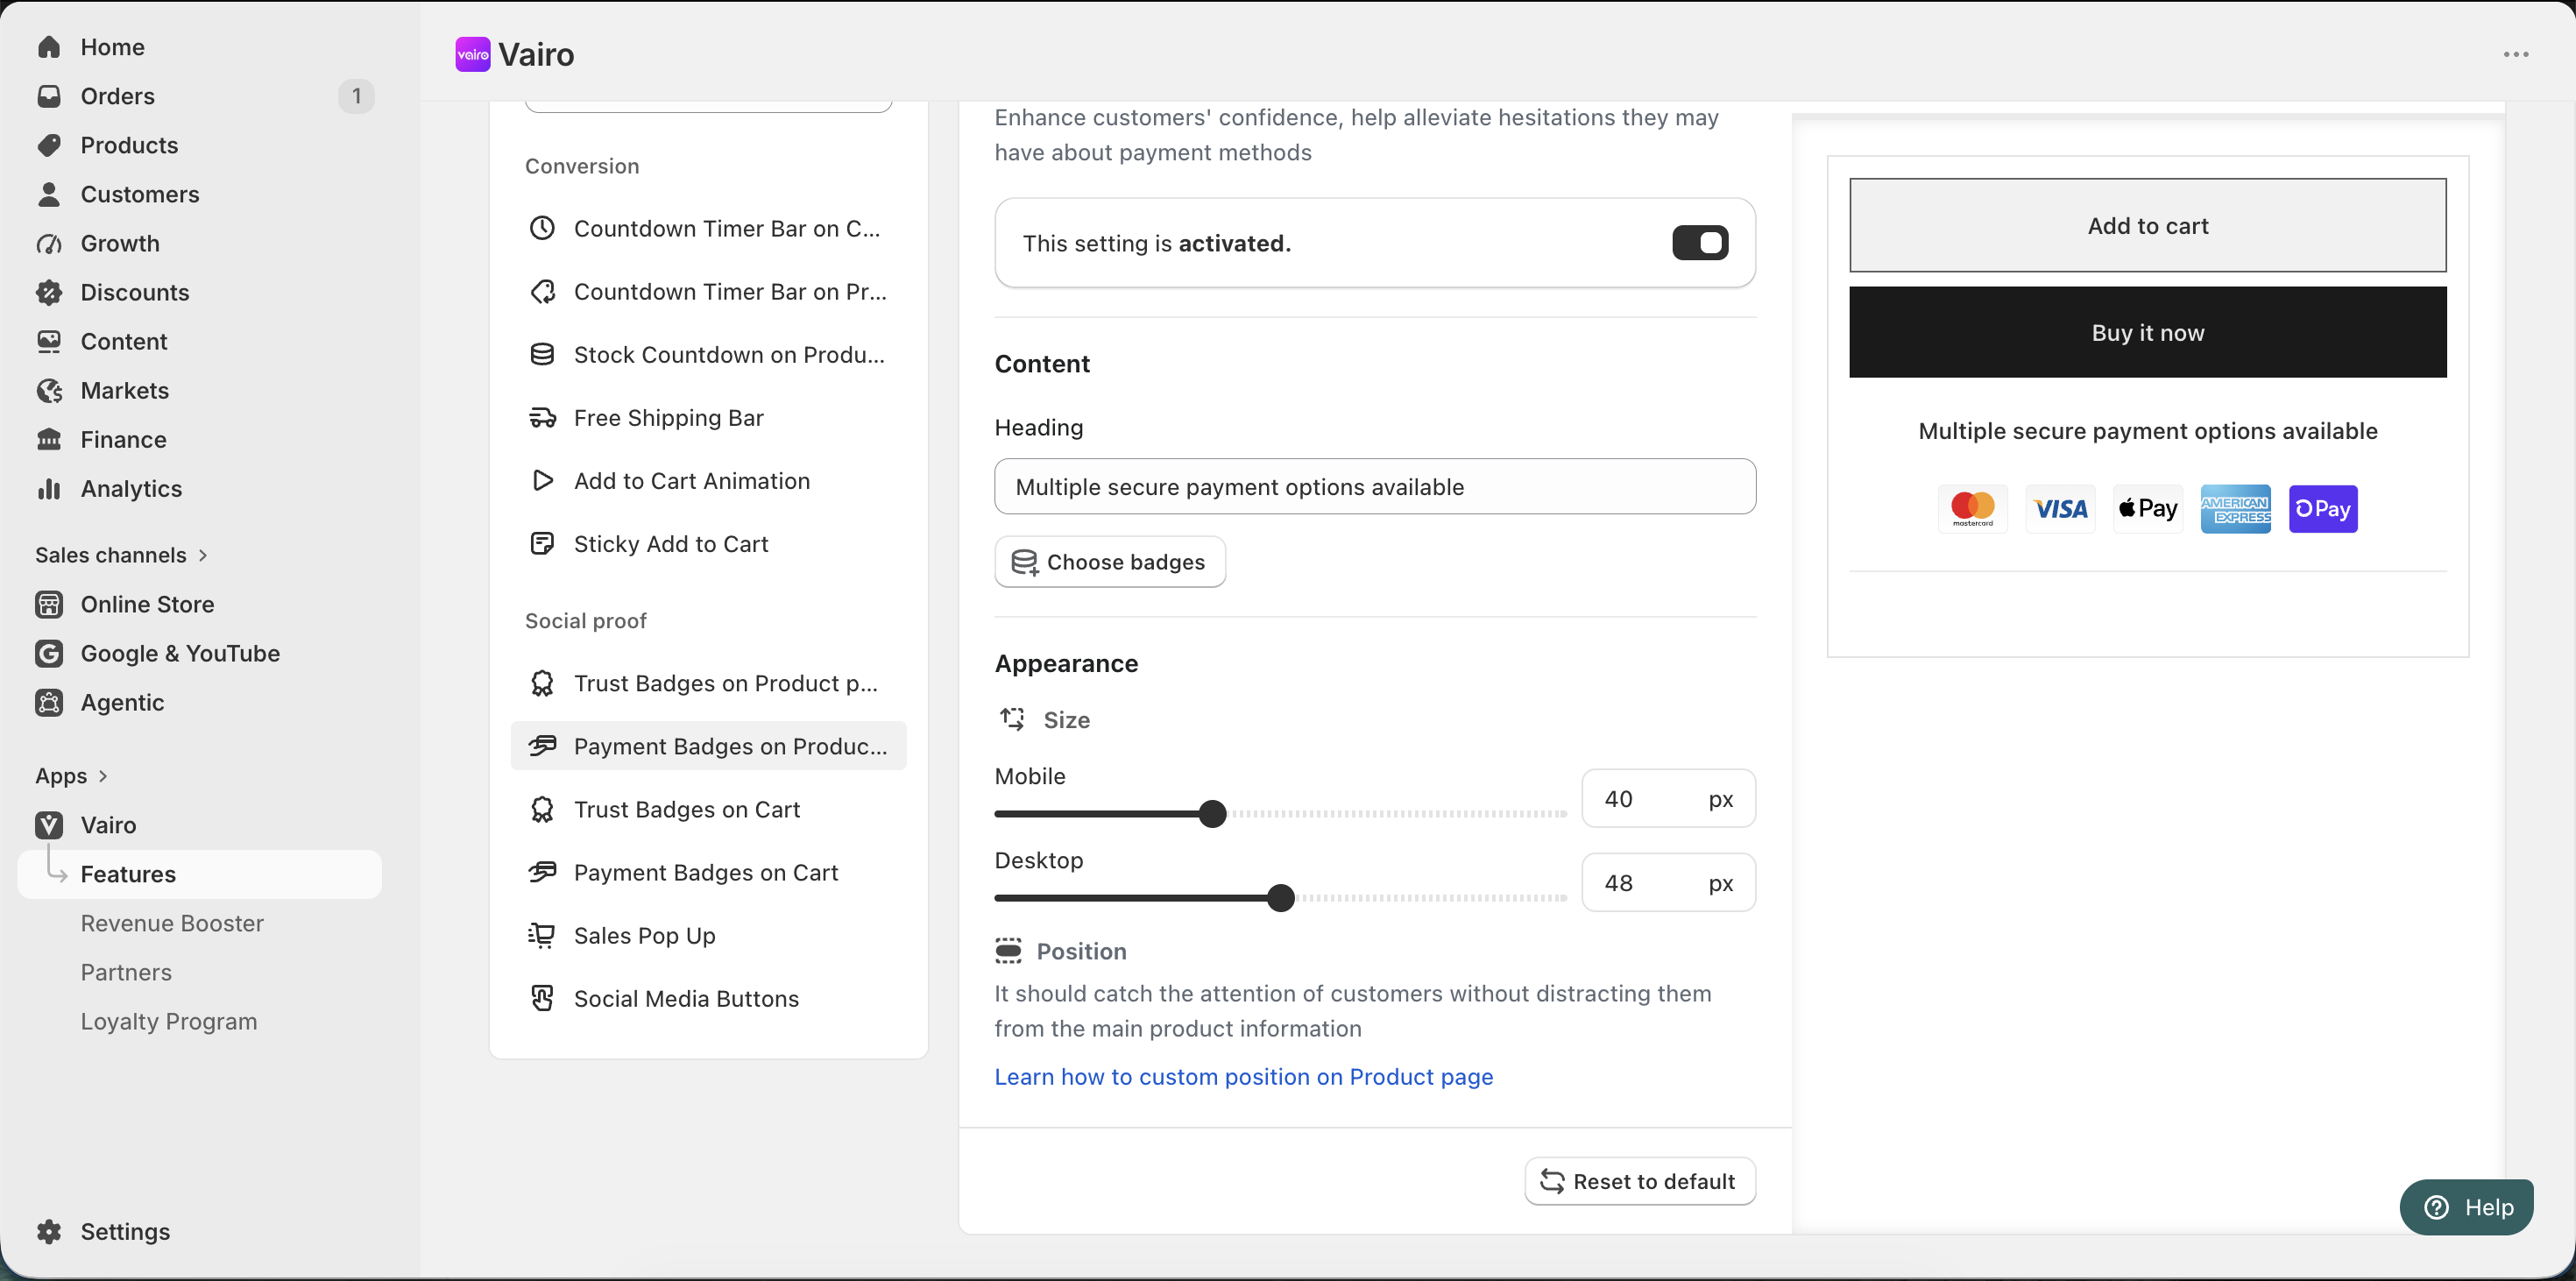
After completing the setup, visit your storefront to make sure the Payment Badges display correctly.
Need help?
If you need further assistance, feel free to contact our support team at [email protected].