How to Set Up Product Labels & Badges in Vairo
Product Labels & Badges help highlight important products, such as best sellers, new arrivals, or discounted items, making them more noticeable and encouraging customers to engage with them.
With Vairo, you can choose from a variety of built-in label designs, assign them to specific products, and customize how they appear on your storefront.
How to Set It Up
Step 1: Enable Vairo App Embed
- Make sure the Vairo App Embed is enabled before creating product labels and badges.
- If you haven't enabled it yet, follow this guide: How to Enable Vairo App Embed.
Step 2: Create Product Labels & Badges
- Open Vairo in your Shopify Admin.
- Navigate to Page enhancements > Product Labels & Badges.
- Click Add Label.
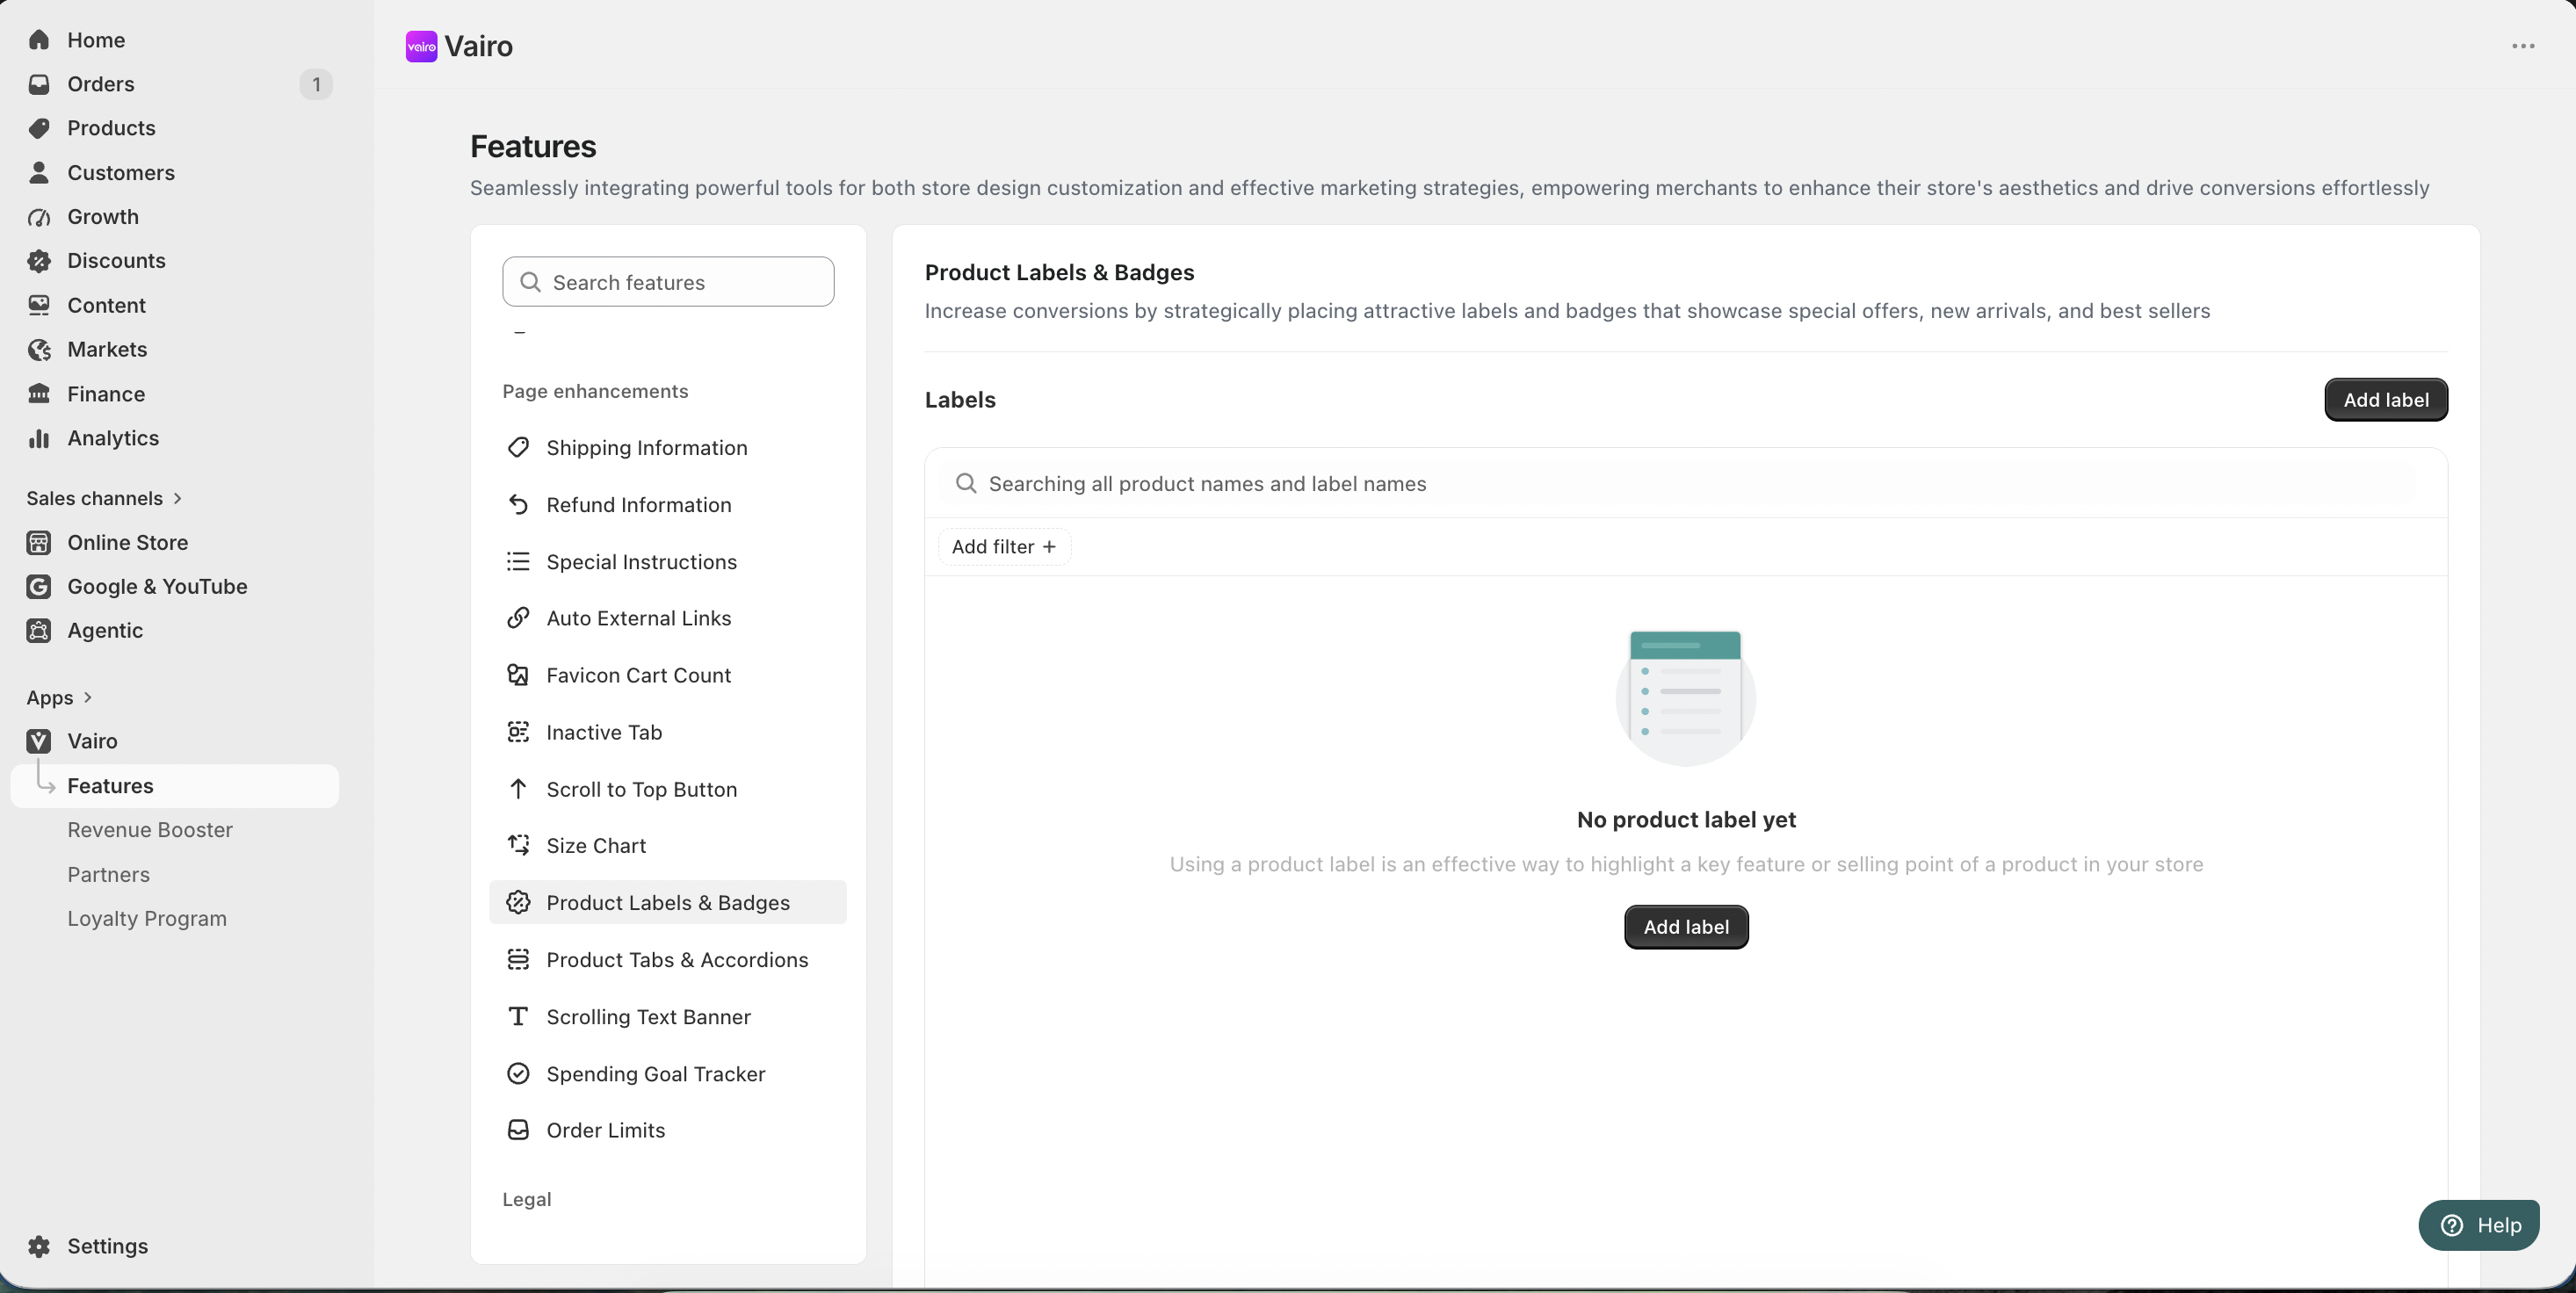
- Then configure your label:
- Enter a label name (example: Bestseller).
- Choose a label design from the available library. You can also browse labels by category.
- Assign products where the label will appear.
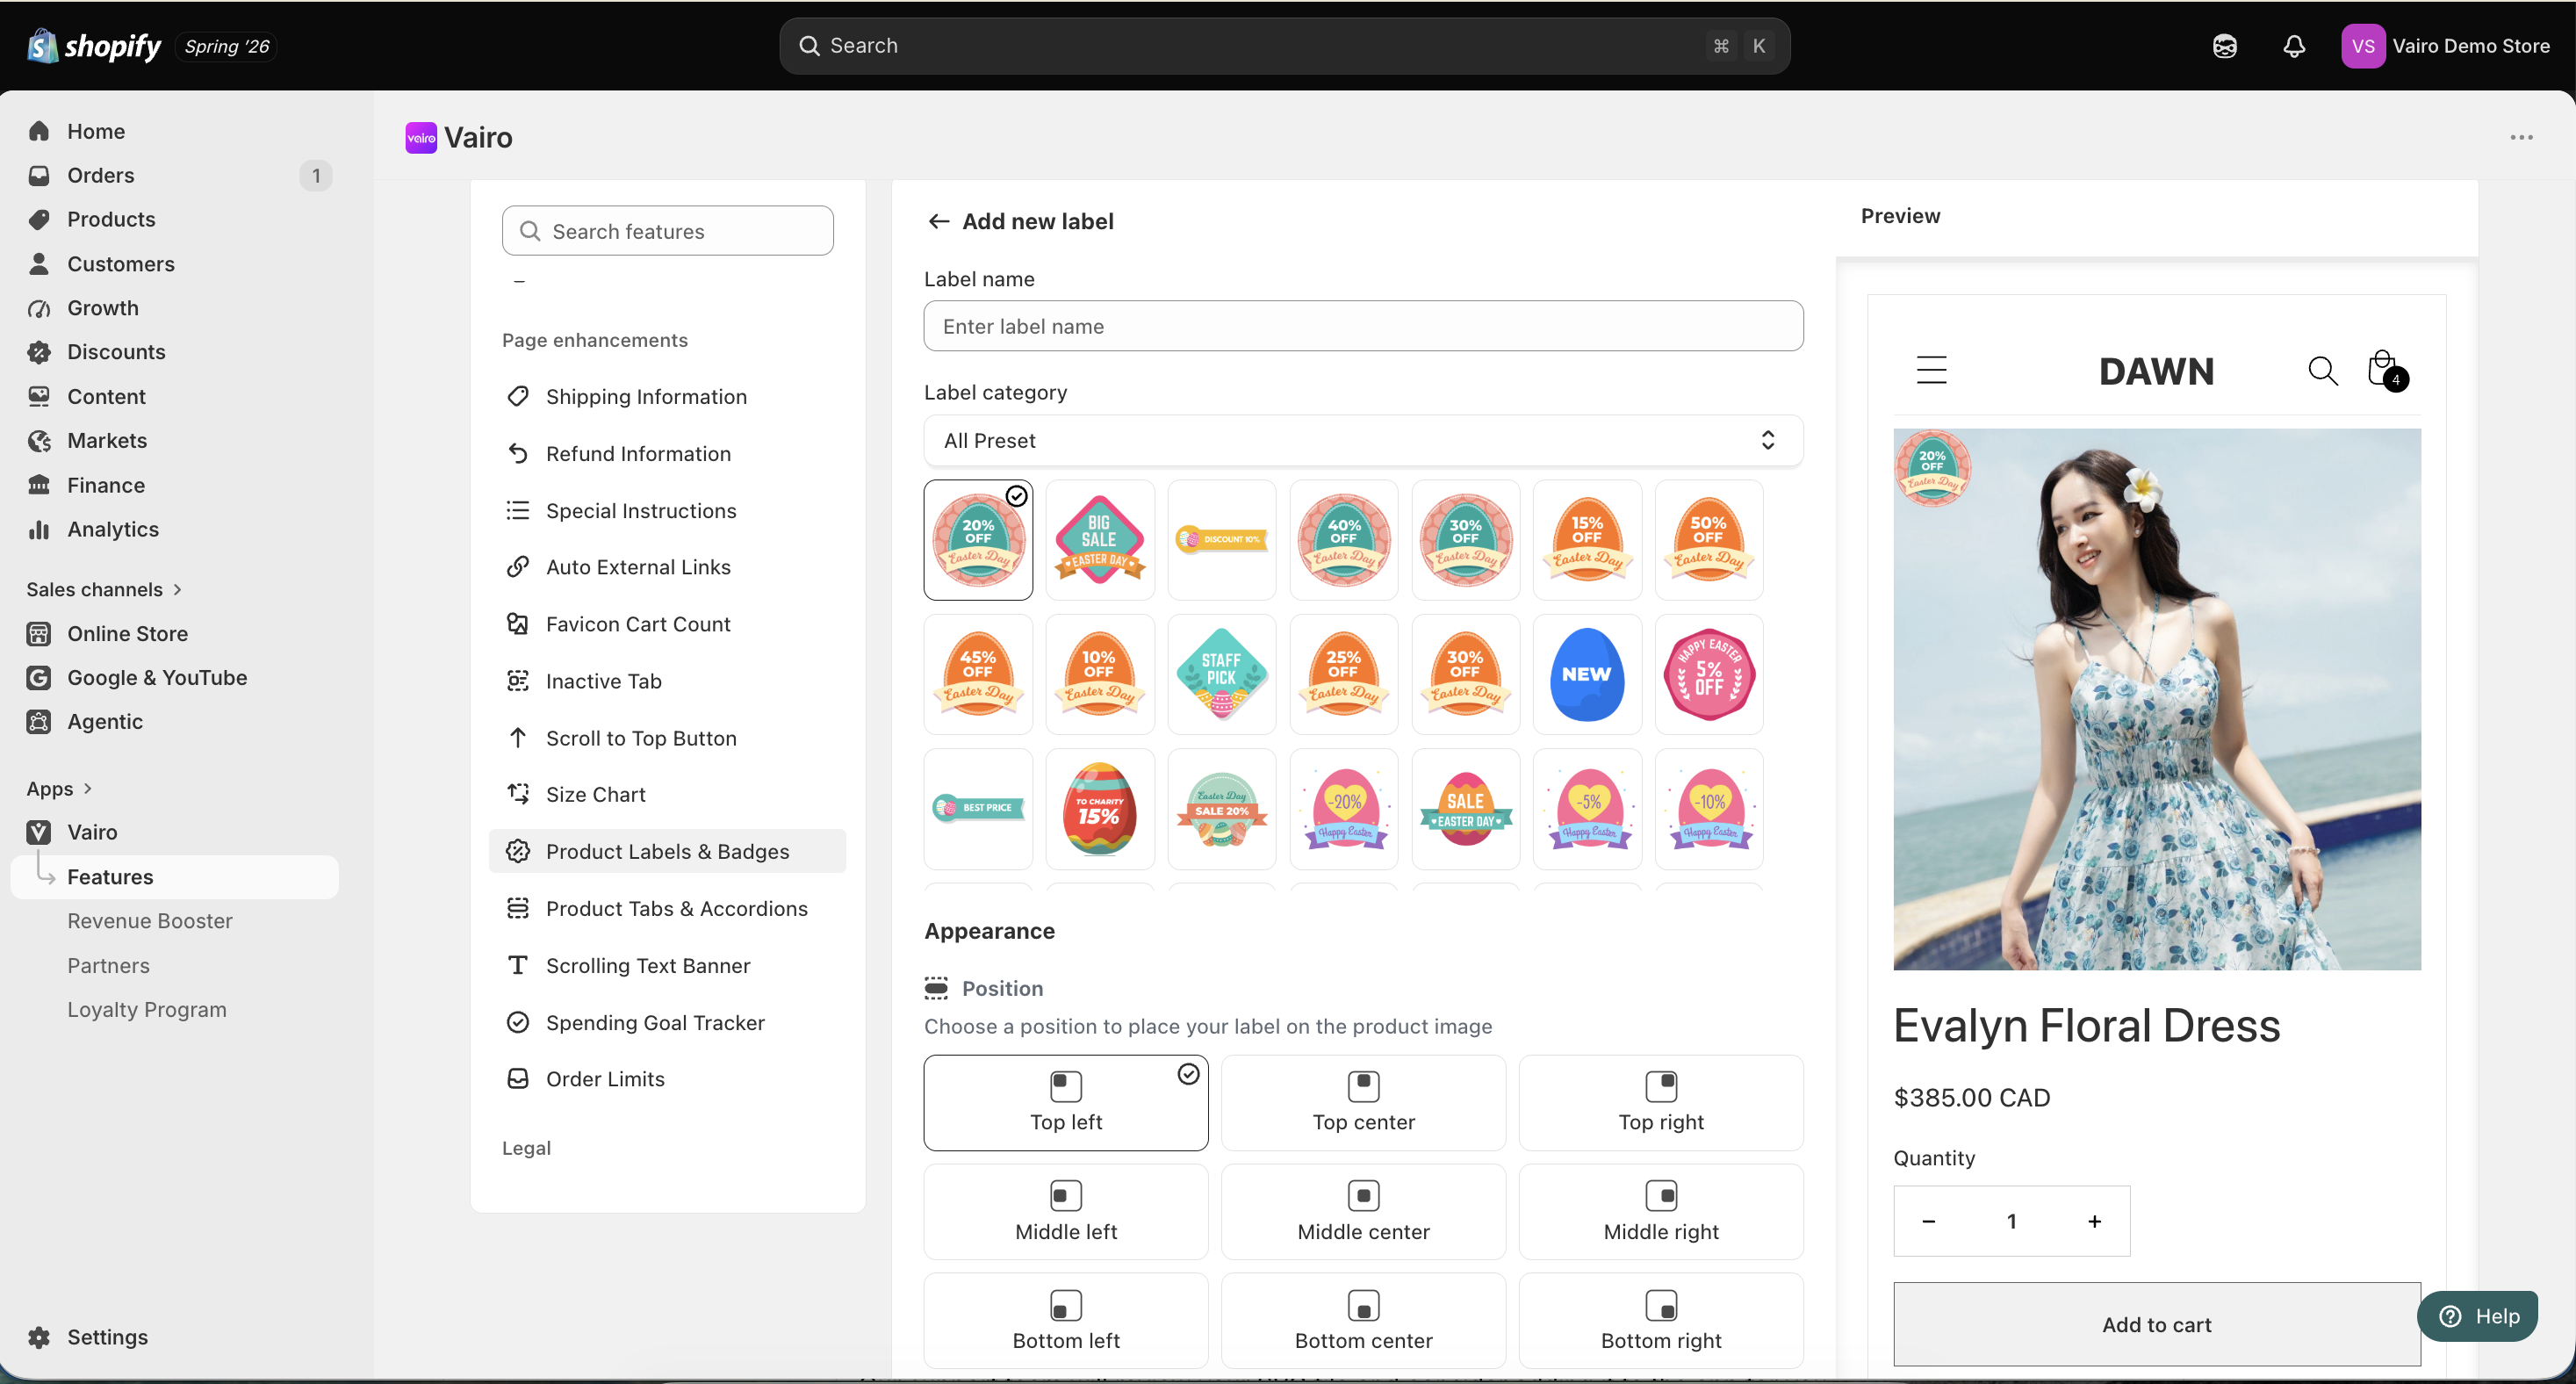
- After creating the label, you can Activate or Delete it at any time.
Step 3: Customize Label Appearance
In the Appearance Settings section, you can:
- Change the label position on the product image.
- Adjust the label size.
- Select an animation effect to make the label more noticeable.
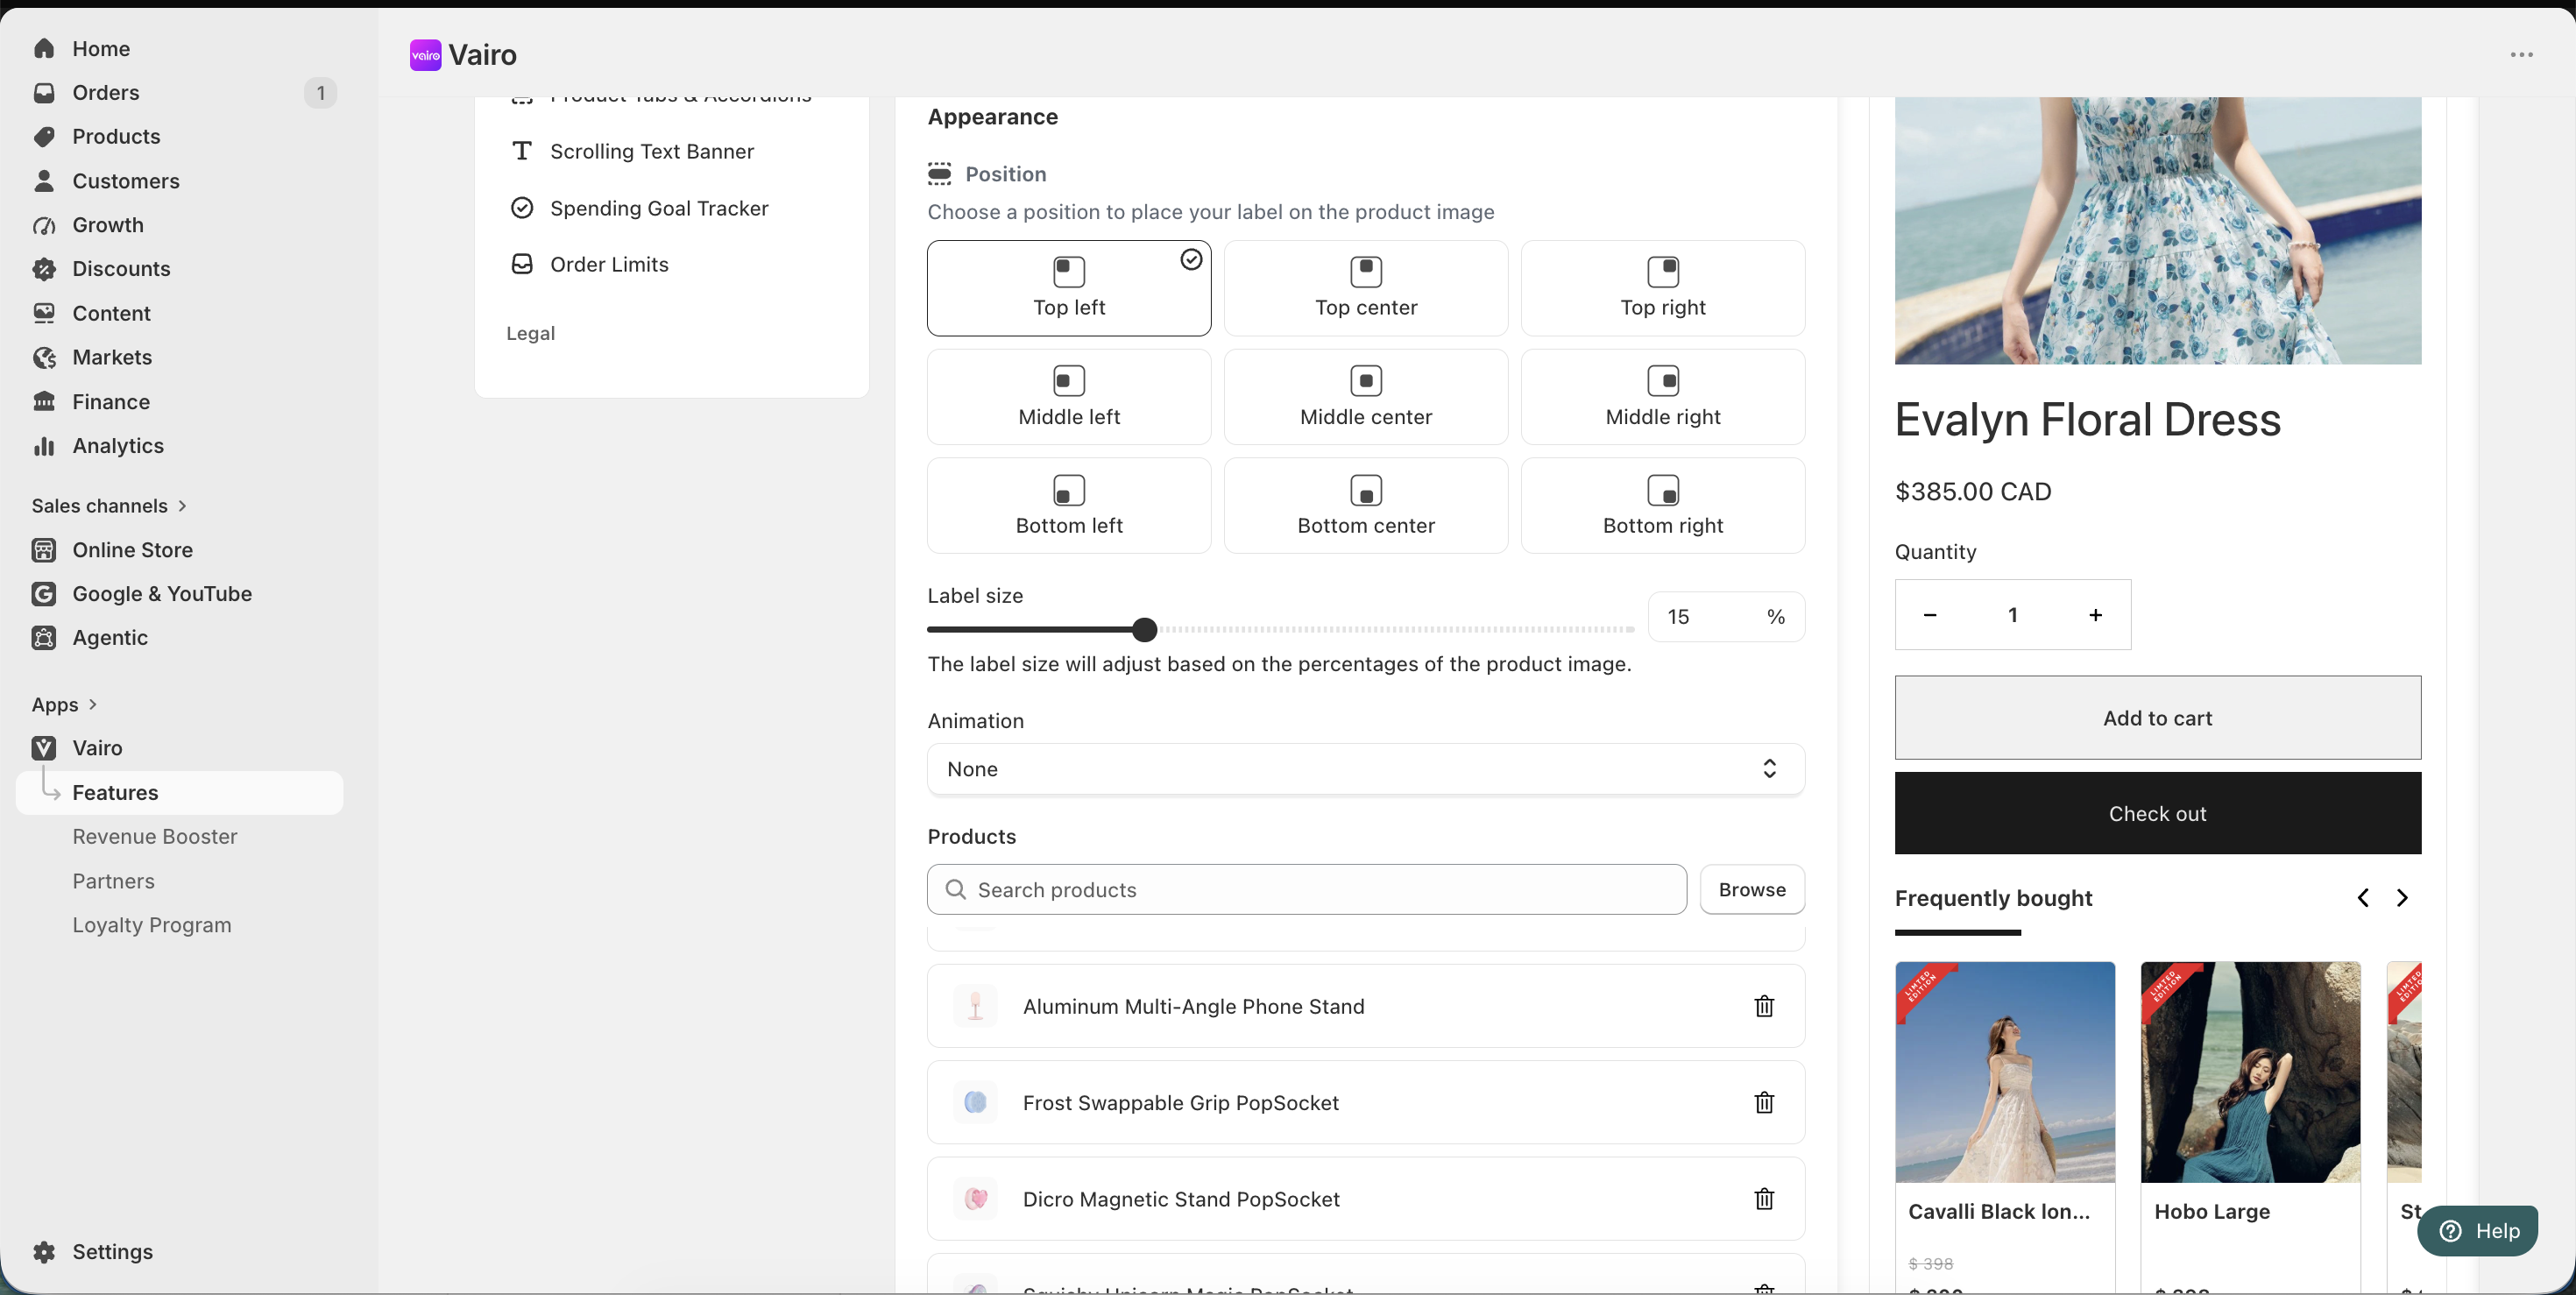
After activating the label, check your storefront to make sure it displays as expected.
Use Your Own Label Design
If you'd like to use your own label design instead of the built-in templates, send your SVG file to [email protected].
Our support team will review your SVG file and consider adding it to the app for you.
Need help?
If you need further assistance, feel free to contact our support team at [email protected].